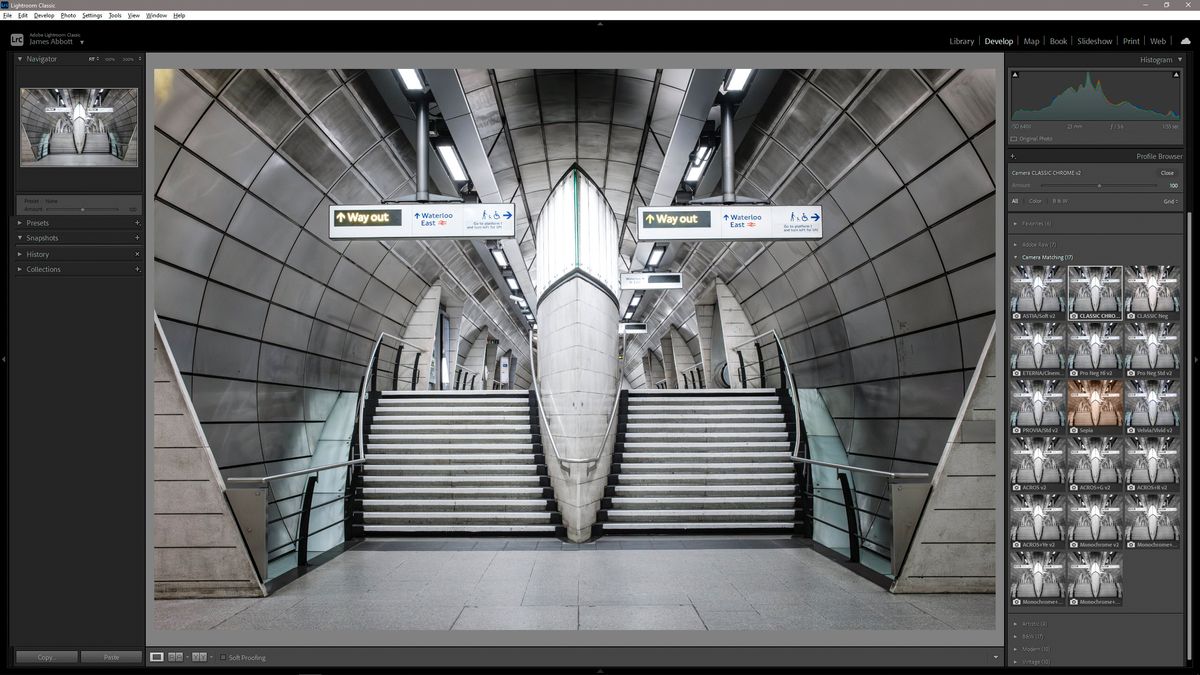
If you shoot with a Fujifilm X-series camera like the gorgeous X100V, you’ll be well aware of the Film Simulations that can be applied to JPEGs as you shoot. They can even be bracketed so that you can create several versions of the same image with different Film Simulations applied at the point of capture.
It’s a pretty neat feature, whether you’re shooting with the amazing medium format Fujifilm GFX100 II or one of the best beginner cameras like the Fujifilm X-S20, but what if you selected one color profile at the point of capture but really wanted another? Or how can you take advantage of Film Simulations if you shoot raw format?
As the title suggests, Adobe Lightroom provides the ability to apply Film Simulations to Fujifilm raw files, which is a fantastic feature for users of X-series cameras who shoot raw and an excellent reason to choose raw over JPEG capture. If you shoot raw, you can choose any of a number of Film Simulations after capture.
If you shoot with a camera from another manufacturer, you may now be thinking that you too can take advantage of this feature, but this unfortunately isn’t possible; the Film Simulations only present themselves with Fujifilm raw files. Also, even when you shoot with a Fujifilm camera, older camera models may have fewer Film Simulations available than more recent and current models.
Fujifilm Film Simulations
Fujifilm Film Simulations are essentially presets that in some cases mimic the look of classic color and black & white Fujifilm films. These can be applied to JPEGs at the point of capture or to raw files in Adobe Lightroom and Adobe Camera raw. After the release of the GFX100 II at the end of 2023, there are 20 Film Simulations available, with twelve color (including Sepia), and eight black & white Film Simulations. So, with your Fujifilm raw files loaded into Lightroom, let’s take a look at how to achieve popular film looks…
Steps for how to apply Fujifilm Film Simulations
- Process your Fujifilm raw file
- View and apply Film Simulations
- How to return to the default color profile
Tools and requirements
- Raw files taken with a Fujifilm X-series camera
- Adobe Lightroom (Creative Cloud or Classic)
Step by step guide for how to apply Fujifilm Film Simulations
1. Process your Raw file
(Image: © James Abbott)
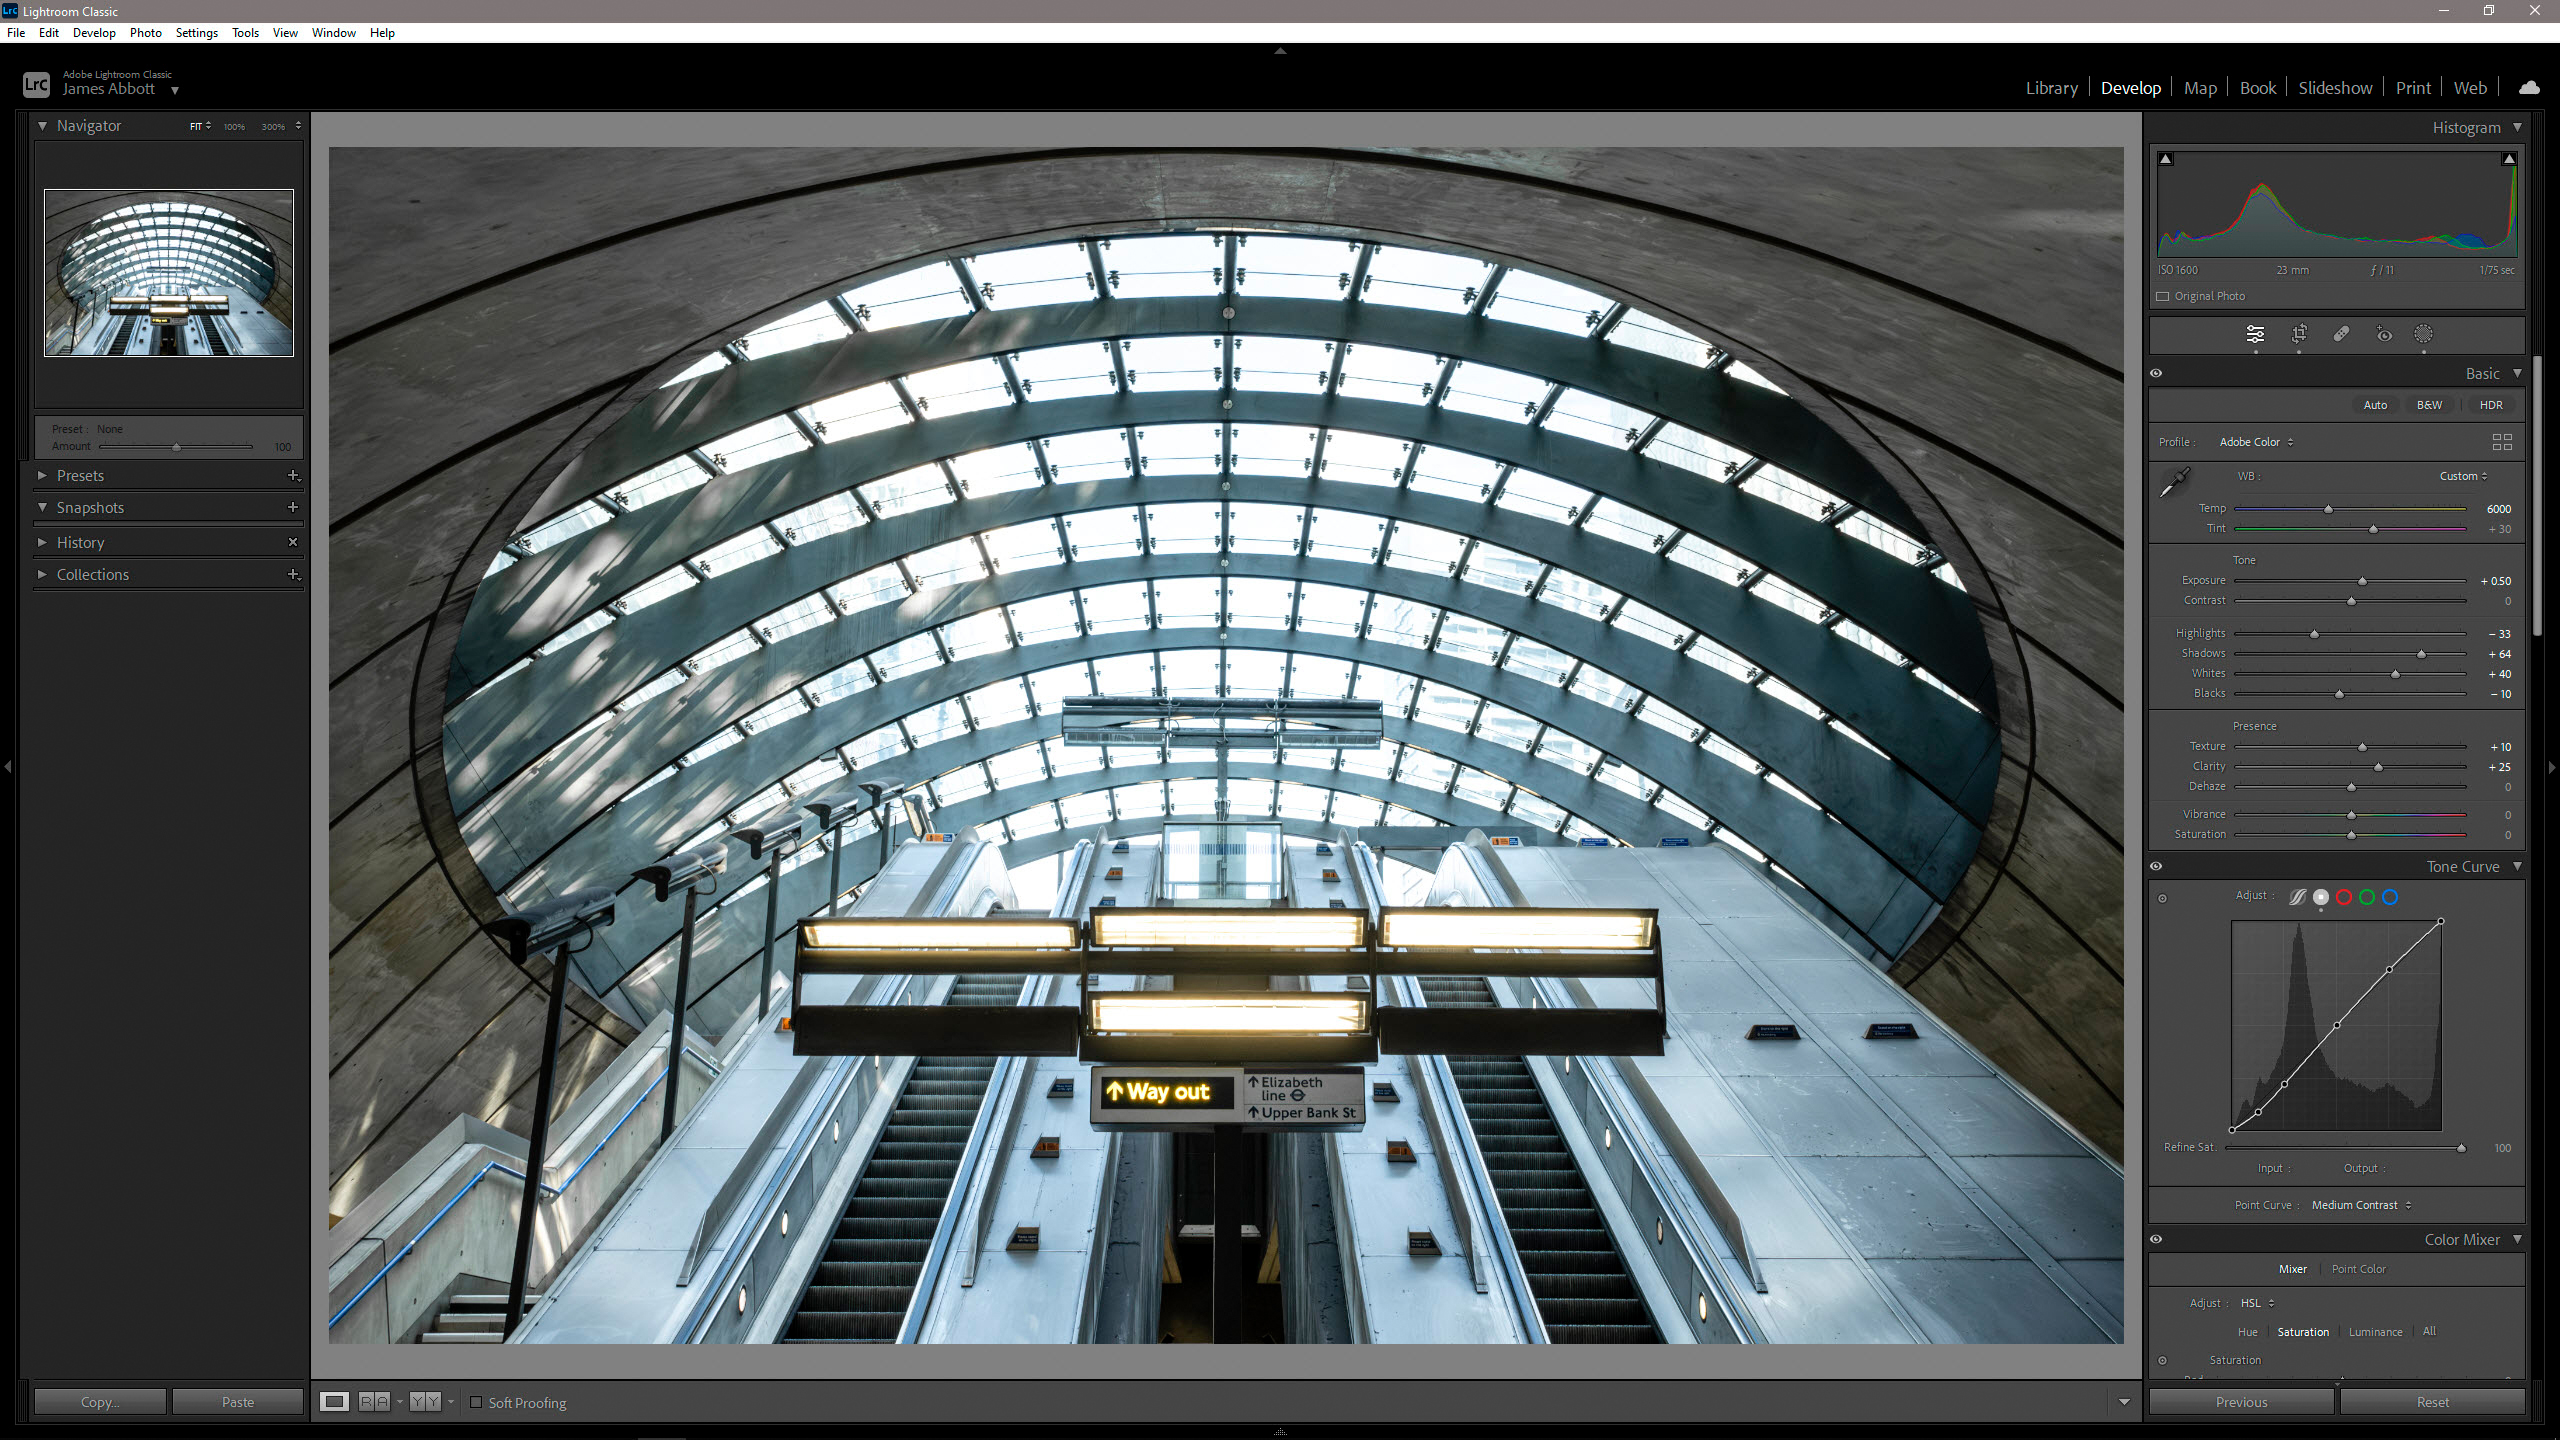
This step can be applied before or after step two, the order you choose is a matter of personal preference. But the advantage of processing your Fujifilm raw files first using Basic Adjustments (exposure), Masking and any other controls you use within Lightroom to make your image look how you like, is that you will see the effect of Film Simulations on a perfectly exposed image with the right level of contrast. You can then move onto step two; apply the Film Simulation, and then make further adjustments if required.
2. View and apply Film Simulations
(Image: © James Abbott)
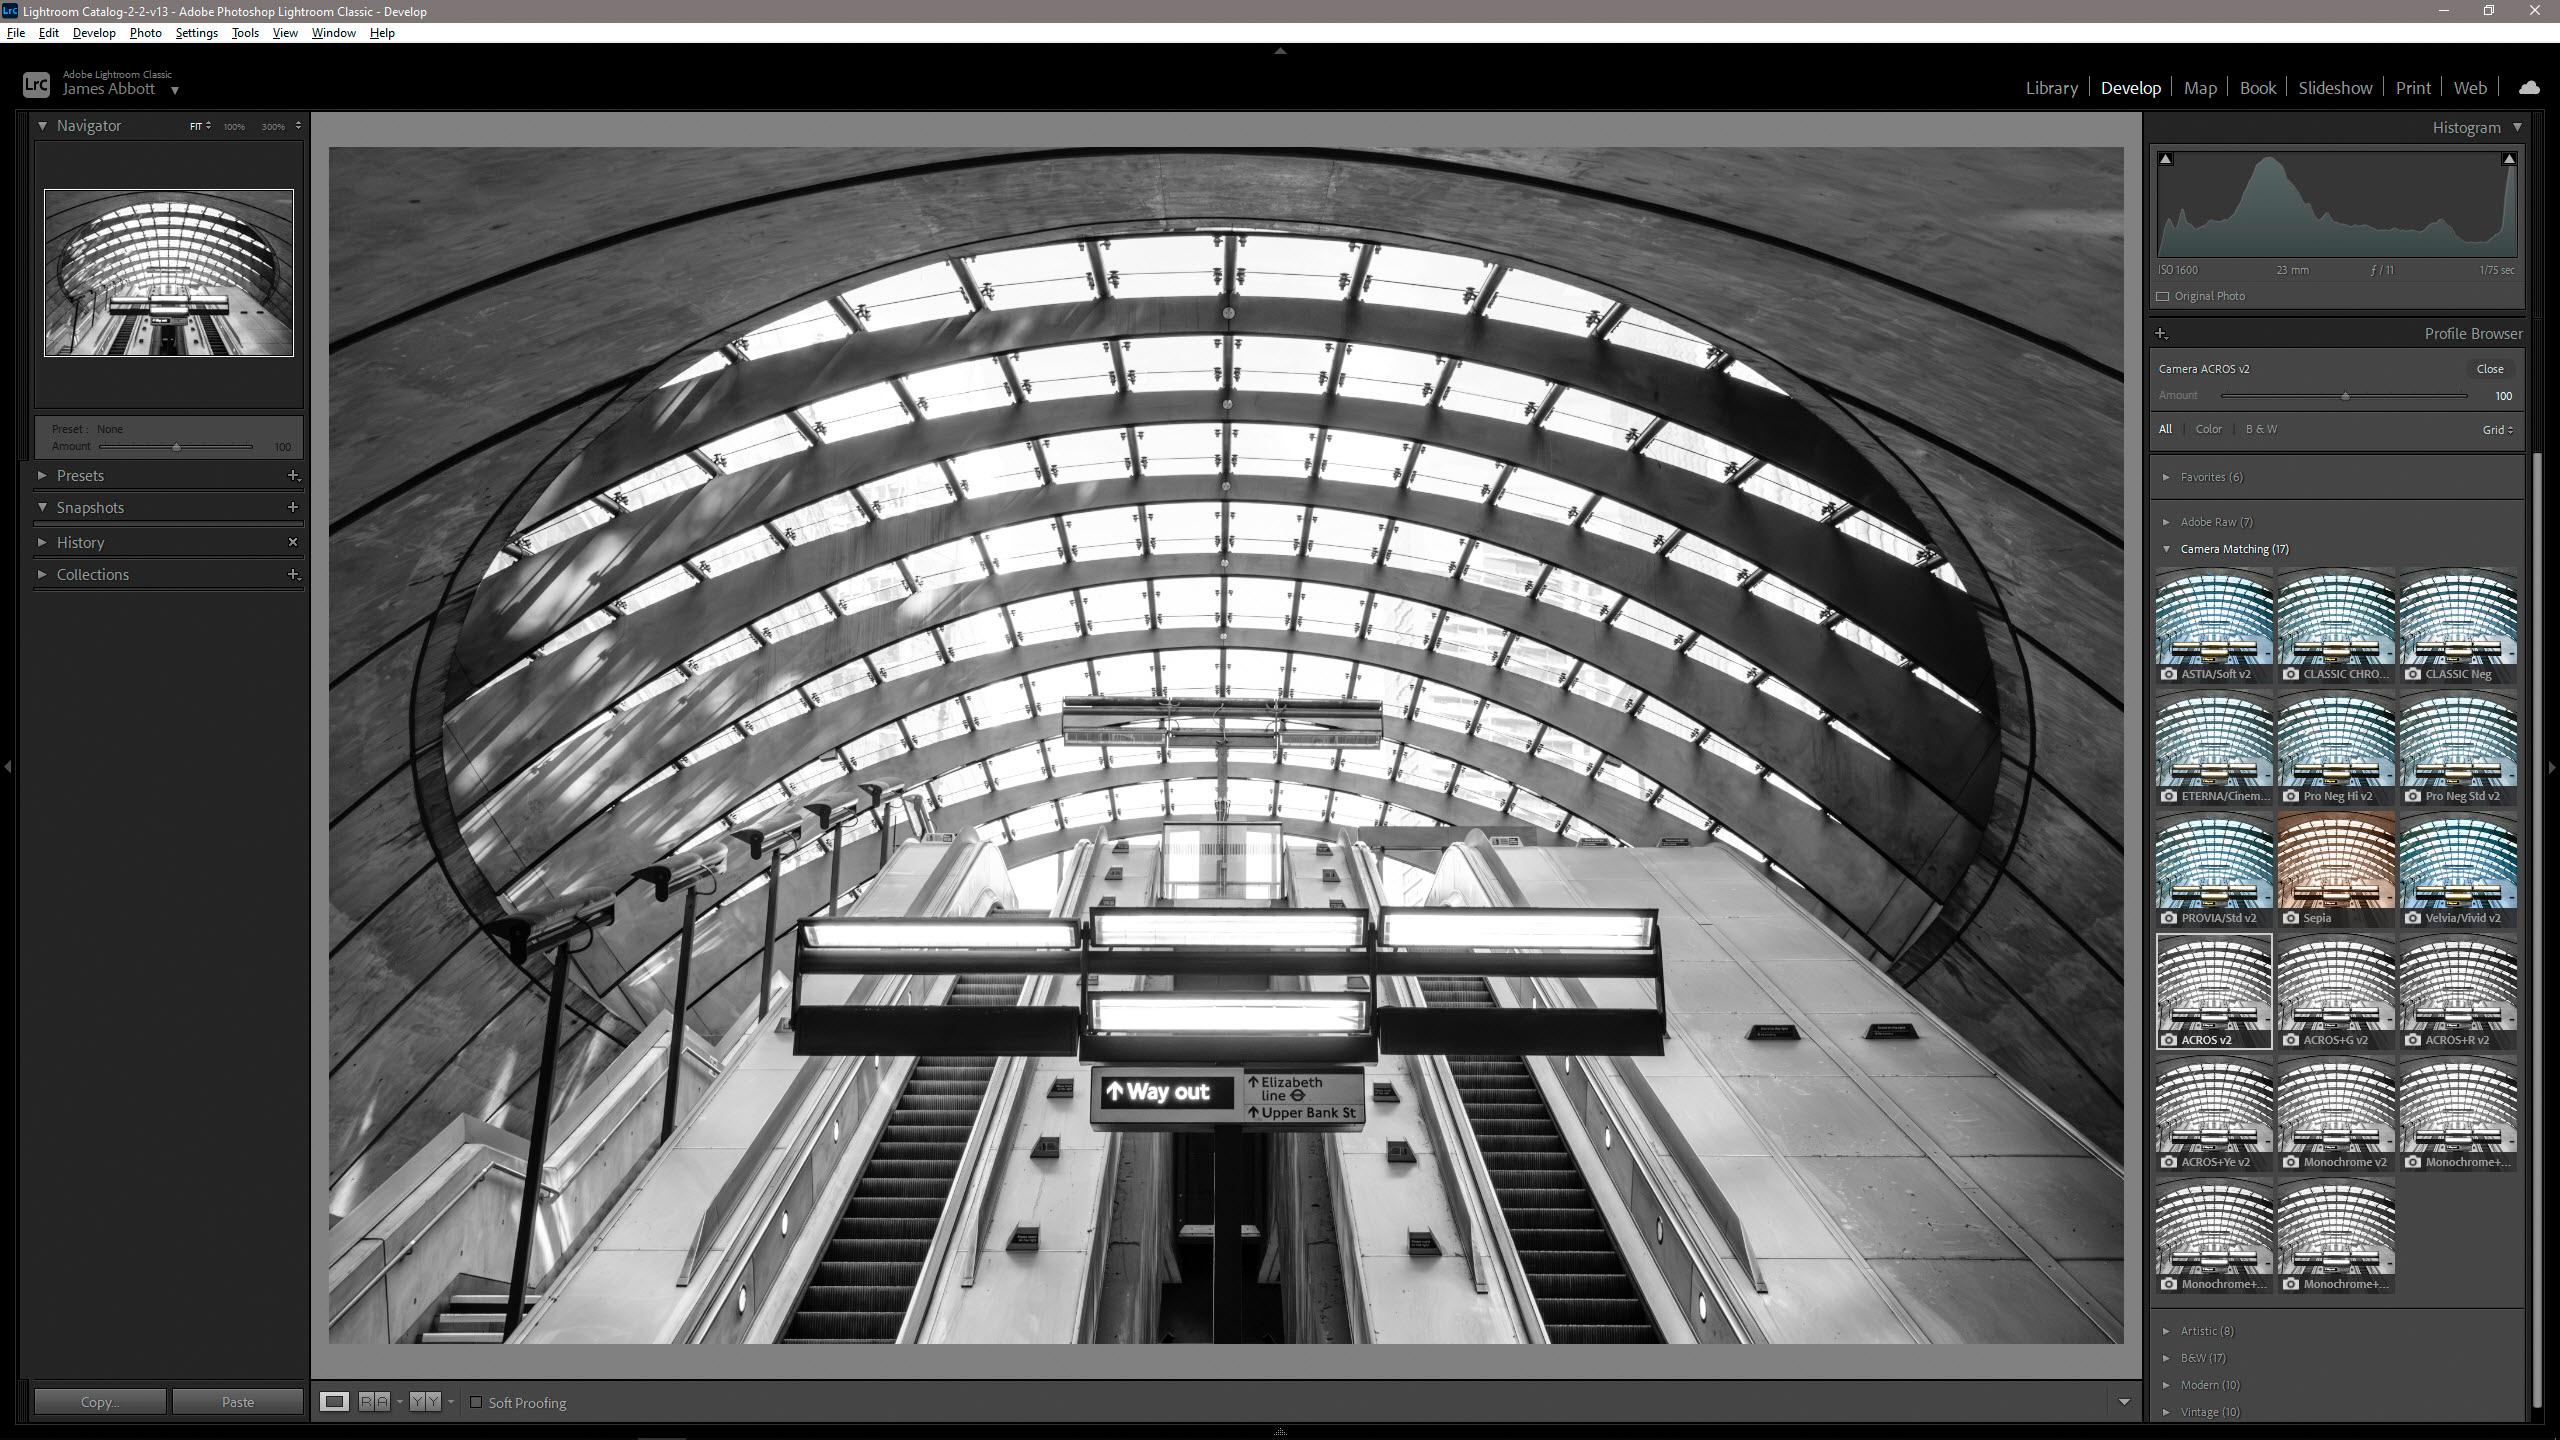
At the top of the Basic panel, click on the Profile dropdown menu that’s set to Adobe Color by Default and select Browse. When the tab opens, expand the Color Matching tab and the Fujifilm Film Simulations available will appear as thumbnails. Now, when you hover over any of these the effect will be temporarily applied to the image in the main image window, and to fully apply simply left mouse click on the desired Film Simulation. Click on the Close button when finished, and don’t forget to export your edits of the raw file to save as a new JPEG copy.
3. How to return to the default Color Profile
(Image: © James Abbott)
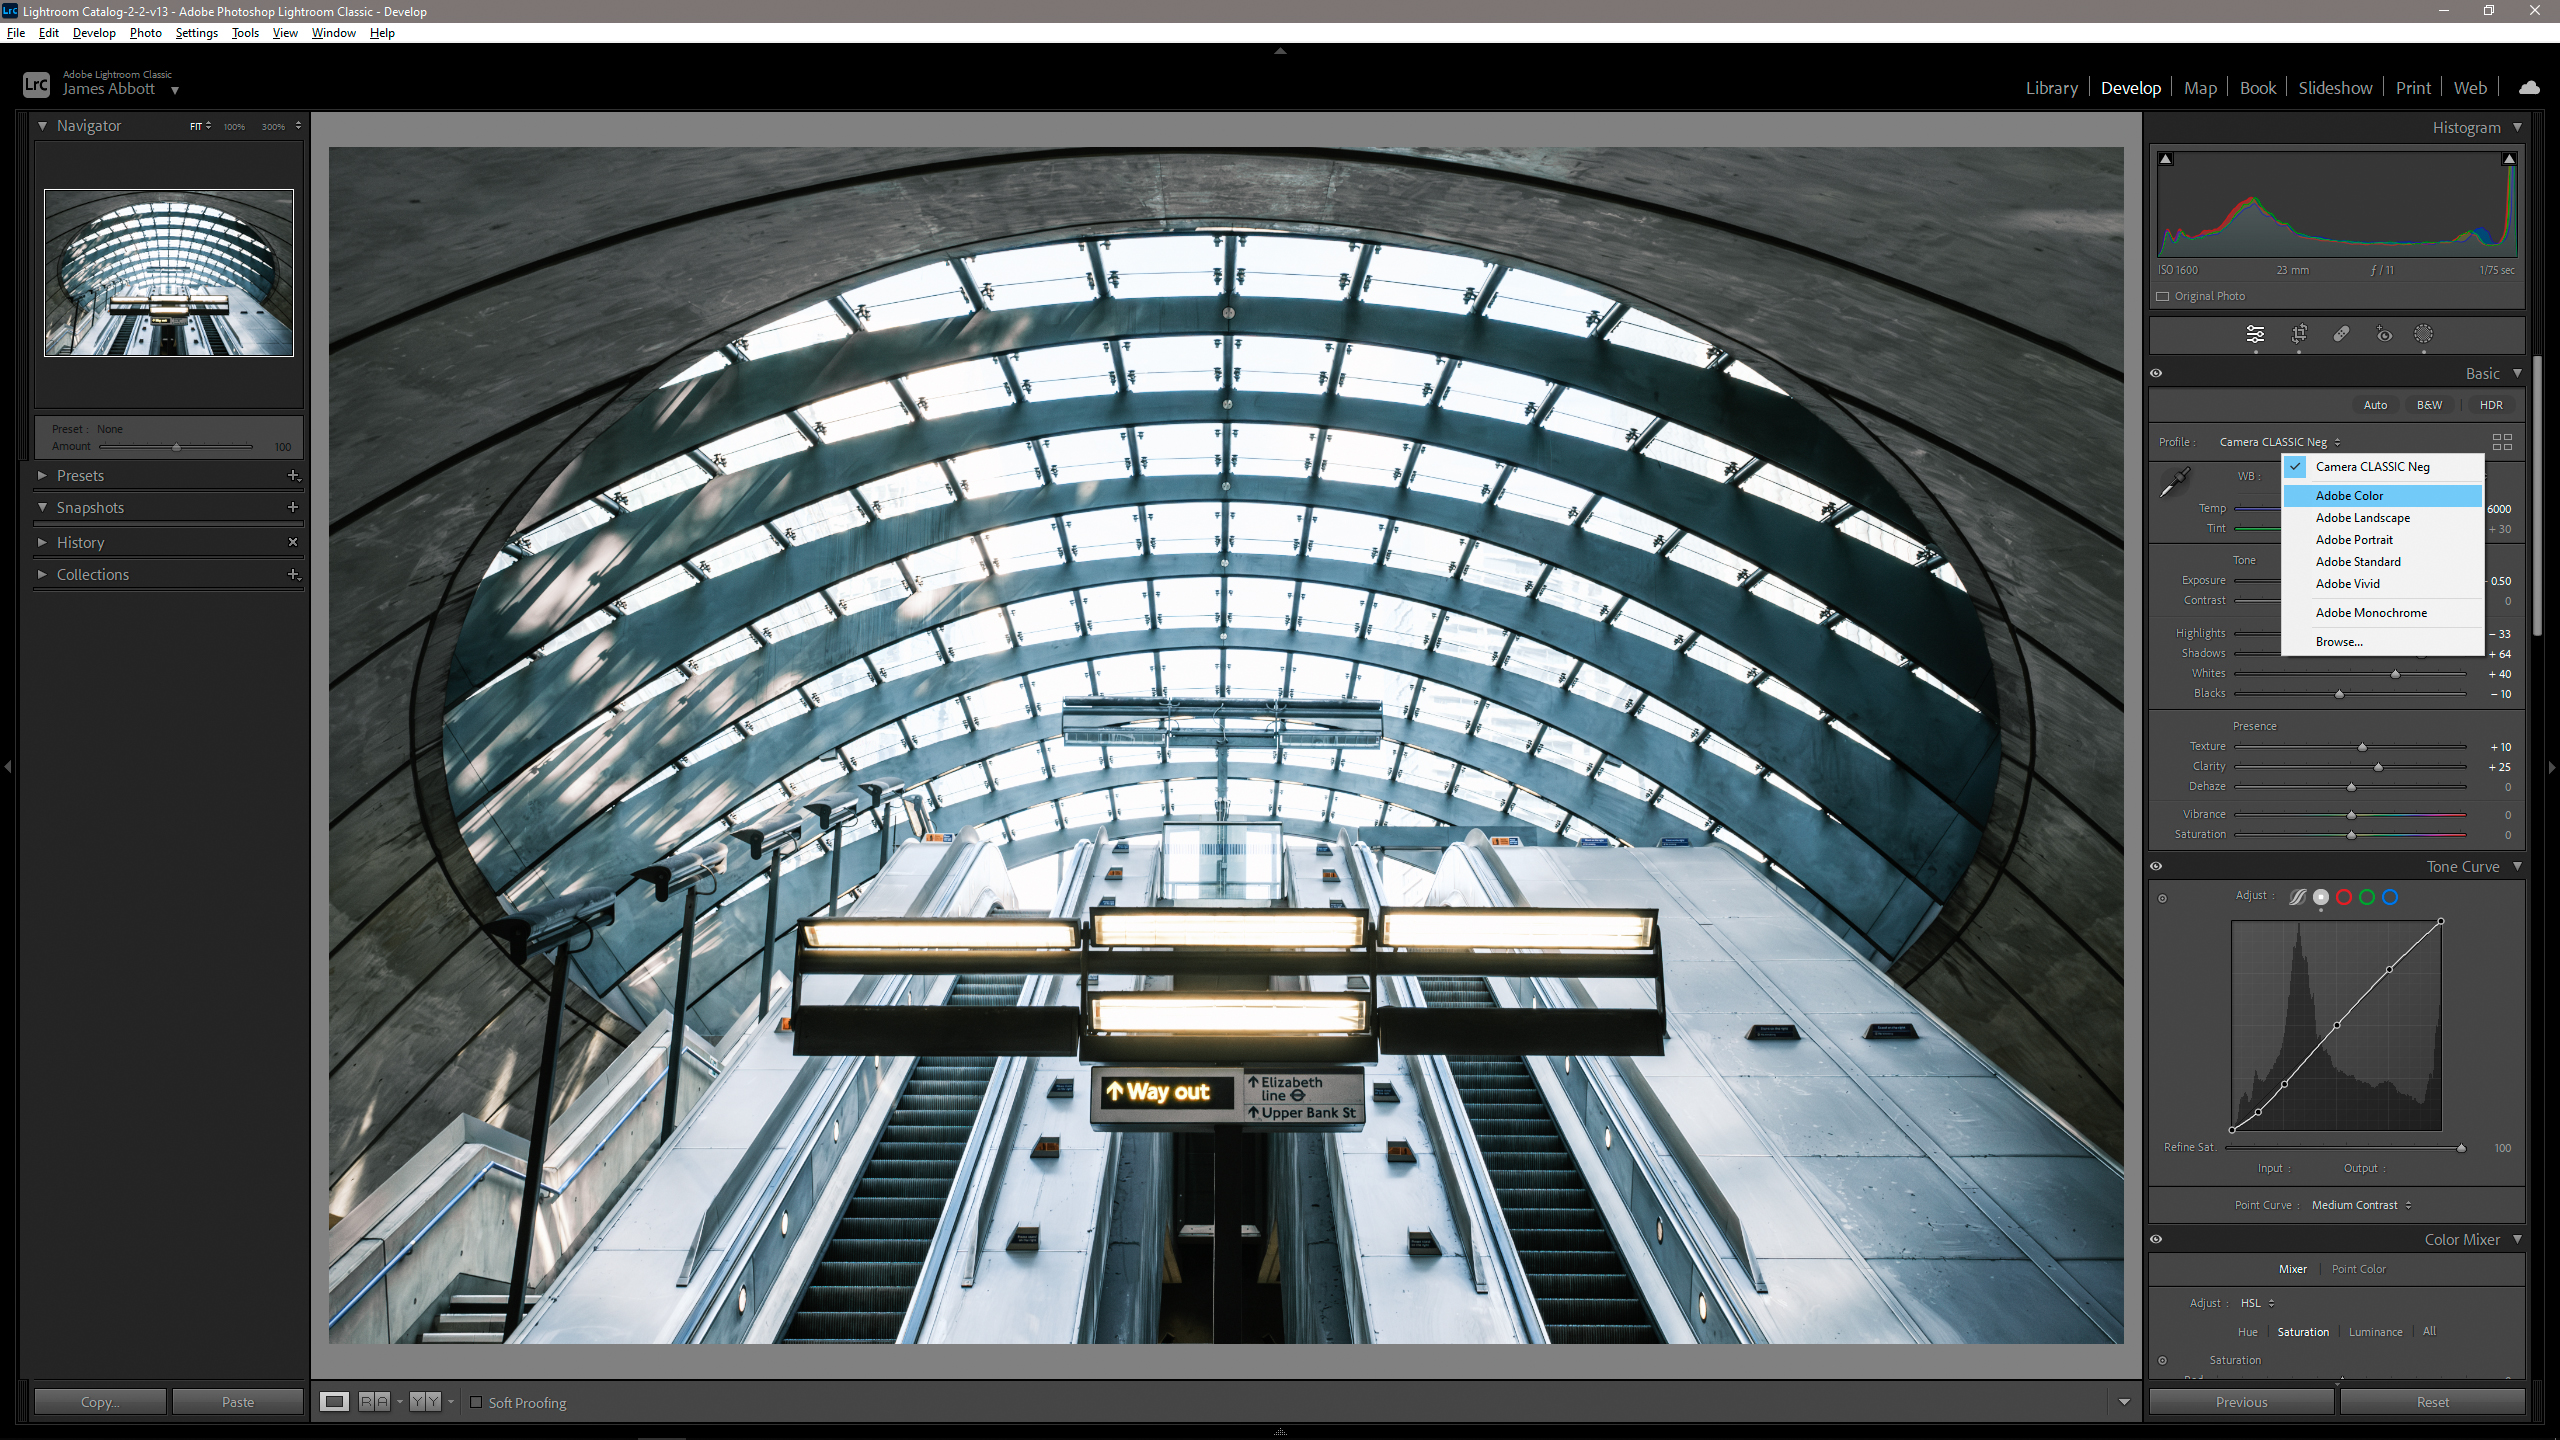
You might delve into the Fujifilm Film Simulations and decide that none of the options available suit the image that you’re working on, so you’d like to return to the default Adobe Color Profile or one of the other Adobe Profiles. To do this, you can either expand the Adobe Profile tab within the main Color Profile tab and select the relevant Adobe Profile, or if you’ve closed the Profile tab you can click on the dropdown menu attached to the Profile name and select the desired Adobe Profile.
